
Expansion Shell Bolt Company Shares Key Factors for Durable Anchor Installations
2026-11-02
A loose anchor can turn a routine installation into a structural nightmare—and the difference often comes down to details most contractors never think twice about. That’s why Supreme Machinery, an expansion shell bolt manufacturer known for demanding jobs, is sharing the key factors that separate durable anchor installations from ones that fail under pressure. If you rely on expansion shell bolts for concrete or masonry, these insights might change how you approach every job.
The Base Material Sets the Limit for Every Anchor
An anchor only works as well as the material it bites into. Concrete, solid brick, hollow block, or drywall each behaves differently under load, and no anchor design can overcome a weak substrate. A wedge anchor that excels in cured concrete will simply pull loose from a hollow-core wall, because there is nothing behind the face to hold the expansion.
Before choosing fasteners, check the base rather than assuming the anchor is the weak point. High-strength concrete allows deep embedment and predictable wedge action; old or lightweight masonry tends to crumble or spall. In softer or brittle materials, the failure shifts from the steel to the surrounding zone, so the load rating on the box often means little unless the base can actually support it.
Matching the anchor type to the base is not a suggestion, it is the first rule. For solid substrates, expansion or undercut anchors make sense. For hollow or fragile bases, adhesive anchors, sleeves, or toggles spread the load differently and keep the material from failing first. Once the base crumbles, no amount of torque or oversized hardware will restore holding power.
Drilling Without Wiggle Room: Why Hole Tolerance Matters
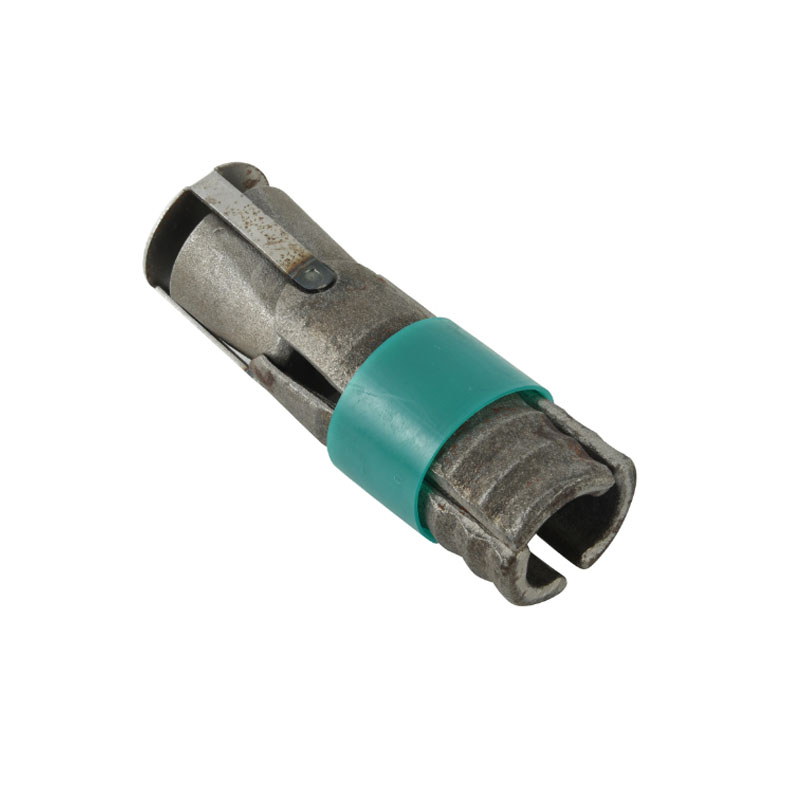
A drill bit rarely cuts to its labeled diameter. When a drawing calls for a 0.250” hole, the actual result might come in at 0.252” or 0.249” depending on spindle runout, feed pressure, and how many holes that bit has already burned through. Hole tolerance is the difference between a bolt that slides in by hand and one that needs a hammer. In assemblies with no wiggle room—dowel pins, locating shoulders, bearing seats—those couple thousandths are the entire ballgame, and ignoring them turns a simple drilling job into a stack of out-of-position parts.
The pain shows up when several holes have to line up. A three-hole flange with a ±0.005” callout might look fine on paper, but stack that across six inches and the mating part can bind before the last bolt starts. Tighter than needed, and the shop has to follow the drill with a reamer or boring head, driving up cost and lead time. Looser than needed, and the joint shifts under load, frets, or vibrates loose. The material matters too: aluminum moves more with temperature, stainless work-hardens and grabs tools, and cast iron’s uneven hardness can steer a drill off-center. Tolerance isn’t just a number—it’s a decision about how much drift you can live with.
So before adding another tight dimension, ask what the hole actually does. Clearance for a 1/4-20 screw only needs enough room for the shank and a little misalignment; an H7 locator hole for a dowel means a completely different process and inspection routine. The practical move is to spell out hole size, position, and tolerance together, then pick the method that hits that range without over-processing. If the assembly truly has no wiggle room, budget for a reamer or boring operation instead of hoping a twist drill will hold a tenth. That’s how you keep hole tolerance from becoming the reason the whole build gets scrapped.
Dust Left in the Hole Can Cut Holding Strength in Half
Most people assume a drill hole is ready as soon as the bit comes out, but the fine powder left behind is far from harmless. That dust coats the walls of the hole and prevents adhesives or mechanical anchors from making direct contact with the base material. Instead of biting into solid concrete or brick, the fastener ends up pressing against a loose layer of crushed particles that can shift under load.
The result is often dramatic. Pull-out tests on wedge anchors and threaded rod set into uncleaned holes have shown holding strength dropping by 40 to 60 percent compared to holes that were blown or brushed clean. Even small amounts of dust trapped at the bottom can keep a bolt from seating fully, which transfers stress to the top few threads and creates a weak point that fails early.
Cleaning is simple but rarely done carefully enough. A quick puff of breath or one pass with a brush usually leaves enough residue to compromise the connection. The most reliable sequence is to brush the hole, blow it out with compressed air, and repeat until no visible dust comes out. For anchors where every bit of capacity matters, skipping that second or third pass is essentially leaving half the strength on the table.
Shell Bolts Are Not One-Size-Fits-All for Every Load
Selecting a shell bolt without matching its specifications to the actual load conditions often leads to premature failure or joint leakage. A bolt that holds a static, low-pressure cover plate may seem identical to one used on a pulsating compressor shell, but the required tensile strength, fatigue resistance, and preload behavior are completely different. For instance, a stud sized for mild thermal cycling can stretch permanently under high cyclic stress, losing clamping force over time.
Load direction matters just as much as magnitude. Many shell joints experience bending, shear, or combined loads rather than pure axial tension. A standard hex bolt might handle pure tension well but performs poorly when the flange tries to rotate or slide. In those cases, shouldered bolts, larger bearing surfaces, or controlled tightening sequences become necessary to keep the joint seated. Ignoring these nuances turns a supposedly simple fastener into the weakest link.
Material and coating choices also shift with the operating environment. A zinc-plated carbon steel bolt works fine for indoor equipment with minimal temperature swings, but the same bolt on an outdoor shell exposed to salt spray or process chemicals will corrode and seize. High-temperature services require bolts with appropriate creep strength and thermal expansion compatibility with the flange. Ultimately, the right shell bolt depends on the entire load picture, not just a diameter and thread pitch.
Torque Isn’t Guesswork Once You Understand Friction
Most people treat torque like a magic number they look up in a chart and hope for the best. But once you dig into the physics, it stops being a guessing game. Friction is the real actor here — it’s what turns a simple clamping force into a reliable, repeatable joint. The friction between the threads, under the bolt head, and across the mating surfaces all eat up part of the energy you put in. That’s why two identical-looking bolts can need wildly different torque values just because one has a little oil on the threads and the other is dry.
Here’s the trick most manuals won’t spell out: your torque wrench reads applied twist, but the actual preload in the joint depends entirely on how much of that twist goes into stretching the bolt versus overcoming friction. Change the surface finish, add a washer, or even reuse an old bolt with worn threads, and the same torque setting gives you a different clamp load. So instead of blindly trusting a single number, you start asking what kind of friction you’re dealing with — and that’s when torque becomes something you control, not something you guess at.
In practice, this means measuring, not assuming. Lubricants, thread lockers, plating, and dirt each shift the friction coefficient enough to matter. A clean, well-oiled bolt might need 30 percent less torque to hit the same preload as a dry one. If you’re working on something critical, you don’t just grab the factory spec and crank away — you factor in the actual surfaces in front of you. That’s the difference between a joint that stays put for years and one that rattles loose on the highway.
Exposure to Moisture and Temperature Swings Deserves a Second Look
Most material failures tied to weather don’t happen during a single extreme event. They build up through cycles: a humid night followed by a hot afternoon, then a sudden cool-down. Each swing forces surfaces to expand and contract at different rates, and the gaps that open up are rarely visible until something else goes wrong.
Condensation often gets blamed on leaks, but it can form inside wall cavities or under protective layers when warm, moist air meets a cooler surface. That trapped moisture doesn’t need a storm to cause damage—it just needs time. Wood swells, adhesives soften, and metal fasteners start to corrode quietly.
The real issue is that many accelerated tests use steady conditions or smooth ramps, which miss the sharp spikes and repeated shocks of real-world exposure. If a product or assembly is only rated for moderate humidity and stable temperatures, it may be living on borrowed time once it faces day-night cycles, seasonal shifts, or even body heat from nearby equipment.
FAQ
Many installers focus only on the bolt diameter and skip the condition of the hole. A rough, uneven hole wall can reduce expansion grip even if the torque feels right. We consistently see failures traced back to holes that were not blown out properly or were drilled with dull bits that glazed the concrete surface, leaving a weak contact zone for the expansion shell.
Base material is everything. In cracked concrete or material with low compressive strength, the expansion forces can cause local crushing over time. We recommend verifying the actual concrete strength before selecting an anchor, not just relying on the plan sheet. If you encounter lightweight block or aged concrete, you may need a longer shell or a different anchor type entirely.
Torque directly sets the expansion force that locks the shell against the hole wall. Too little torque leaves the shell loose and the bolt can creep under load. Too much torque can strip the internal cone or crack the base material. We tell crews to use a calibrated torque wrench and a two-stage tightening sequence: seat the shell first at about half torque, then finish to the recommended value in one smooth pull.
Dust is the silent killer of anchor capacity. Even a thin layer of concrete dust between the shell and the hole wall can act like a lubricant, dramatically lowering friction and load resistance. Our field tests show that skipping the final air blow or brush pass can reduce pull-out strength by twenty to thirty percent. Blow the hole from the bottom out, brush the walls, and blow again before inserting the shell.
Embedment depth should be dictated by the load requirement and the condition of the base material, not convenience. Going deeper generally gives more cone surface contact and spreads the expansion force over a larger area. But going too deep in thin concrete can blow out the back side. We always match the embedment to the manufacturer's rated depth for the specific shell size and confirm the base material thickness first.
The big three are undersized holes, contaminated holes, and using impact wrenches on the final seating. An undersized hole makes the shell bind before it fully expands, giving a false torque reading. Contaminated holes reduce grip. And impact wrenches can deliver peak torque spikes that exceed the anchor's safe range, causing hidden damage to the cone threads. Hand torque with a calibrated wrench remains the safest approach for final tightening.
A visual check is not enough. We recommend a scheduled program of torque verification on a sample of anchors, especially those exposed to vibration or temperature cycles. If an anchor cannot hold the specified torque without rotating, it has lost preload and should be replaced. Also look for hairline cracks radiating from the anchor hole, rust staining, or any sign of bolt movement under service load.
Conclusion
Anchors only perform as well as the base material allows, so identifying whether the substrate is cracked or uncracked concrete, solid masonry, or something less predictable should happen before any hole gets drilled. Once the base is understood, hole tolerance becomes the next point of failure: an oversized or wobbling bit creates a loose fit that no expansion shell can recover from, while an undersized hole risks binding and false torque readings. Cleaning the hole is not optional either. Dust and debris left behind act like a cushion between the shell and the concrete, often reducing holding strength by half, even when the anchor looks properly set from the outside. Expansion Shell Bolt Company emphasizes that installers who rush past these steps end up with anchors that test fine on day one but lose reliability under real load.
Selecting a shell bolt also means matching the anchor to the actual load condition rather than assuming a heavier bolt is always better. Shear, tension, vibration, and edge distance all change what the system needs. Torque is another area where guesswork leads to trouble, because friction between the bolt, sleeve, and hole wall varies with surface finish and lubrication; a torque value alone does not guarantee the required expansion force. Finally, environmental exposure deserves more than a quick check. Installations subject to moisture, freeze-thaw cycles, or wide temperature swings may need different materials, coatings, or setting procedures to stay durable over time. Combining these factors before installation is more reliable than trying to fix a poorly set anchor later.
Contact Us
Contact Person: Paul
Email: [email protected]
Tel/WhatsApp: 8615067447509
Website: https://www.spironcasting.com